Imagine waking up, eagerly anticipating that first glorious sip, only to be met by a sluggish dribble, lukewarm water, or—the horror!—a coffee that tastes suspiciously like a forgotten penny. That sinking feeling? It’s often the tell-tale sign of limescale, a stealthy saboteur lurking within your beloved coffee machine. Descaling isn’t just a chore; it’s the lifeline for your morning ritual, ensuring your machine delivers peak performance, lasts longer, and, most importantly, consistently brews the delicious, vibrant cup you truly deserve.
As fellow coffee enthusiasts and “process-driven friends” at Home Brew Log, we live for that perfect pour. We’re here to cut through the jargon and the guesswork, empowering you to tackle descaling with confidence. From understanding the science behind the gunk to picking the right potion and navigating your machine’s unique demands, we’ll guide you step-by-step. Let’s get your brewing buddy back to its sparkling best!
Why Descale Your Coffee Machine? Understanding Limescale & Its Impact
Descaling is the critical process of dissolving and removing mineral deposits, primarily limescale, that build up inside your coffee machine, restoring its efficiency and flavor delivery.
Limescale is predominantly composed of calcium and magnesium carbonates, minerals naturally present in tap water, especially in “hard water” areas. As water heats, these minerals crystallize, clinging to internal surfaces like the boiler, heating elements, pipes, and brew head. This insidious buildup acts like cholesterol in arteries, restricting water flow and forcing your heating element to work overtime, leading to higher energy consumption and potential premature failure.
The most noticeable victim? Your coffee’s taste. Restricted flow means inconsistent brewing temperatures and pressures, resulting in under-extraction—a recipe for a weak, bitter, or sour cup. These leached minerals can also directly alter your coffee’s delicate flavor profile, leaving an unpleasant, chalky residue.
It’s vital to differentiate between routine cleaning (tackling coffee oils and residues on external and easily accessible parts) and comprehensive descaling (targeting internal mineral deposits affecting water pathways). Both are essential, but they address entirely different threats to your machine’s health.
How do you know it’s time for this internal cleanse? Your machine often sends distress signals:
- A sluggish brew: Your coffee takes noticeably longer to make.
- Strange gurgles and hisses: Unfamiliar sounds indicate the pump is struggling.
- Lukewarm disappointment: Your coffee isn’t as hot as it should be.
- Off-tasting coffee: A diluted, bitter, or metallic note in your favorite blend.
- Visible white/chalky residue: Around the brew head or in the water reservoir—a definitive red flag.
- Blinking lights: Many modern machines feature a dedicated descaling indicator light or prompt.
The frequency of descaling hinges on your water hardness and usage. For those with very hard water and multiple daily brews, a monthly or bi-monthly descaling might be necessary. Softer water and moderate usage could extend this to every 3-6 months. Always check your machine’s manual for precise guidance. Ignoring these warnings isn’t just inconvenient; it’s a direct path to irreversible damage and a drastically shortened lifespan for your beloved brewer.

To truly appreciate the silent battle against these pesky minerals and their impact on your precious brew, delve into our guide: “The Science of Limescale: How it Damages Coffee Machines and Affects Taste.”
Choosing Your Descaling Solution: Commercial vs. Natural Alternatives
Descaling solutions are acidic compounds formulated to chemically dissolve limescale, restoring internal water pathways and heating efficiency within your coffee machine.
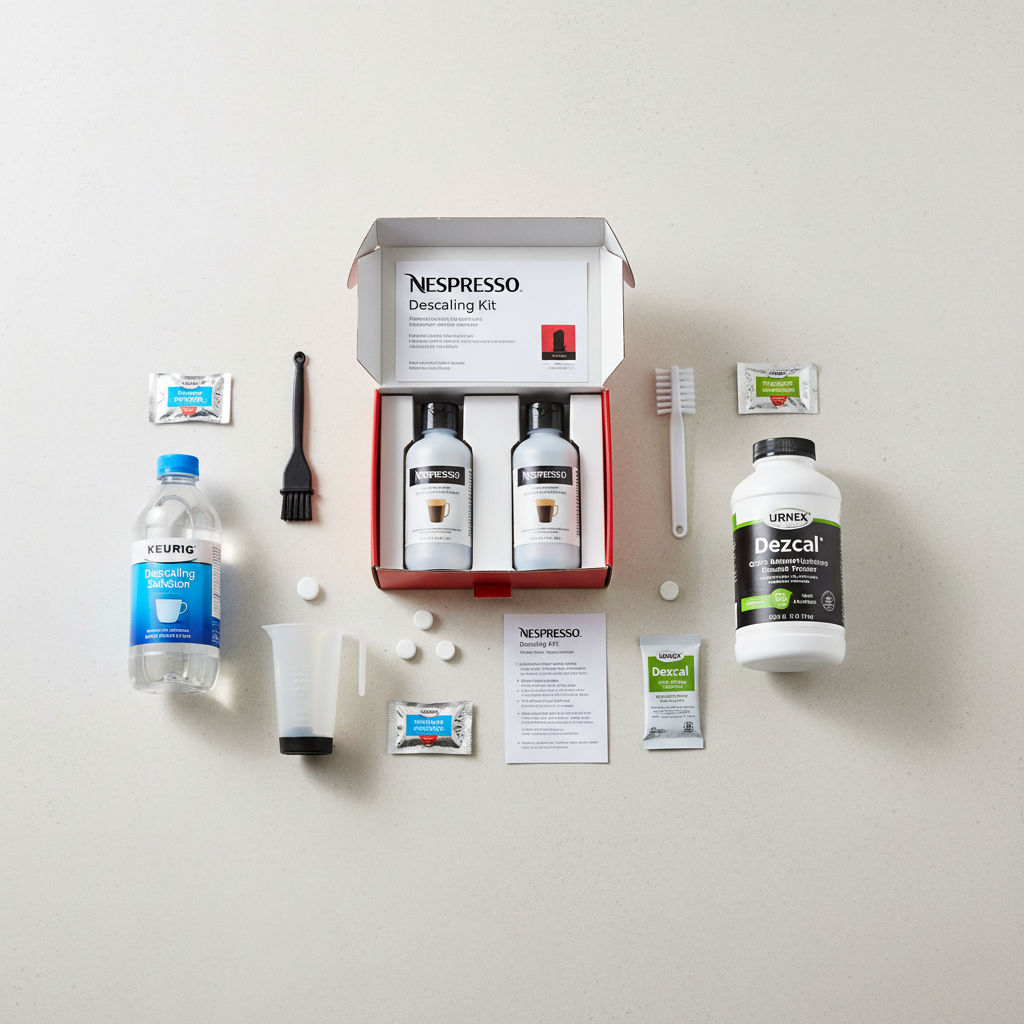
Once you understand why descaling is paramount, the next question is what potion to use. The market offers a spectrum of solutions, from specially formulated commercial kits to accessible natural alternatives. Your machine type and personal preferences will often dictate the best choice.
Commercial Descaling Kits and Solutions
Many coffee machine manufacturers, like Nespresso and Keurig, offer their own branded descaling kits. These are typically fine-tuned for safety and efficacy within their specific machines.
Pros:
- Manufacturer Approved: Often the safest bet, protecting your warranty and ensuring compatibility.
- Optimized Formulation: Expertly designed to tackle limescale without harming delicate internal components like seals or plastics.
- User-Friendly: Many kits are pre-portioned and come with crystal-clear, model-specific instructions.
Cons:
- Cost: Generally pricier than DIY options.
- Availability: May require specific retailers or online purchases.
- Environmental Impact: Some commercial solutions contain stronger acids or synthetic compounds; check ingredients if eco-consciousness is a priority.
You’ll find examples like the Nespresso Descaling Kit, Keurig Descaling Solution, and universal options from brands like Urnex, De’Longhi, and Breville. Always double-check brand compatibility when opting for a non-branded solution.
Natural Descaling Alternatives
For the budget-conscious or environmentally minded brewer, white vinegar and citric acid stand out as popular natural choices.
White Vinegar
Pros:
- Cost-Effective: Inexpensive and a pantry staple for most households.
- Natural: A common, generally safe household product.
Cons:
- Pungent Odor: Its strong, lingering smell can be notoriously difficult to rinse out, potentially tainting subsequent coffee brews.
- Rubber/Plastic Damage Risk: The acetic acid in vinegar can, over time, corrode certain rubber seals and plastic components, especially if used undiluted or left too long. This risk is higher with older or less robust machines.
- Warranty Void: Using vinegar may void your machine’s warranty if it leads to damage not covered by manufacturer guidelines.
- Dilution: Typically requires a 1:1 or 1:2 ratio with water (vinegar to water) for safe and effective descaling.
Citric Acid
Pros:
- Highly Effective: Often the active ingredient in many commercial descalers, a powerful limescale remover.
- Odorless: No lingering smell, a huge advantage over vinegar.
- Food-Grade: Commonly available in powdered form and is food-safe.
Cons:
- Availability: Less common as a household item than vinegar, but easily found online or in baking/canning sections.
- Careful Dilution: Requires precise mixing (e.g., 1-2 tablespoons per liter of water) for both effectiveness and safety.
- Warranty Void: As with vinegar, using citric acid might void your warranty if not recommended by the manufacturer.
Critical Considerations & Comparison
When considering natural alternatives, especially vinegar, a few precautions are paramount:
- Always Check Your Manual: Some manufacturers explicitly advise against vinegar, particularly for machines with aluminum boilers (common in many espresso machines), as it can cause corrosion.
- Dilute Properly: Never, ever use full-strength vinegar.
- Rinse Thoroughly: Run multiple plain water cycles to banish any residual taste or odor.
Here’s a quick comparison to help you choose:
| Feature | Commercial Descaler | White Vinegar | Citric Acid (Powder) |
|---|---|---|---|
| Effectiveness | High (optimized) | Moderate to High | High |
| Safety | High (manufacturer-approved) | Moderate (potential rubber/plastic damage, odor) | High (food-grade, odorless, less corrosive than vinegar) |
| Cost | High | Very Low | Low |
| Environmental | Varies (check ingredients) | Good (biodegradable) | Good (biodegradable) |
| Odor | Minimal to none | Strong, persistent | None |
| Warranty | Maintained | Risk of voiding | Risk of voiding |
For the safest and most effective results, we at Home Brew Log always recommend prioritizing your machine’s manufacturer-recommended solution. If you venture into natural alternatives, citric acid generally offers a superior experience over vinegar due to its lack of odor and reduced risk of material degradation, provided you dilute it correctly. When in doubt, always err on the side of caution.
Curious about the nitty-gritty chemical reactions and specific brands behind each descaling agent? Our deep dive into “Commercial vs. Natural Descalers: A Deep Dive into Your Options” provides all the scientific backing and practical advice you need to make an informed choice.
The Universal Coffee Machine Descaling Procedure: A Step-by-Step Visual Guide
The universal descaling procedure involves preparing your machine, running a descaling solution through its internal system, allowing it to soak, and then thoroughly rinsing to remove all mineral deposits and residue.
While every machine has its quirks, the fundamental logic of descaling remains constant. This guide outlines the essential steps to safely and effectively descale most coffee machines. However, remember that your machine’s owner’s manual is your ultimate authority for model-specific nuances.
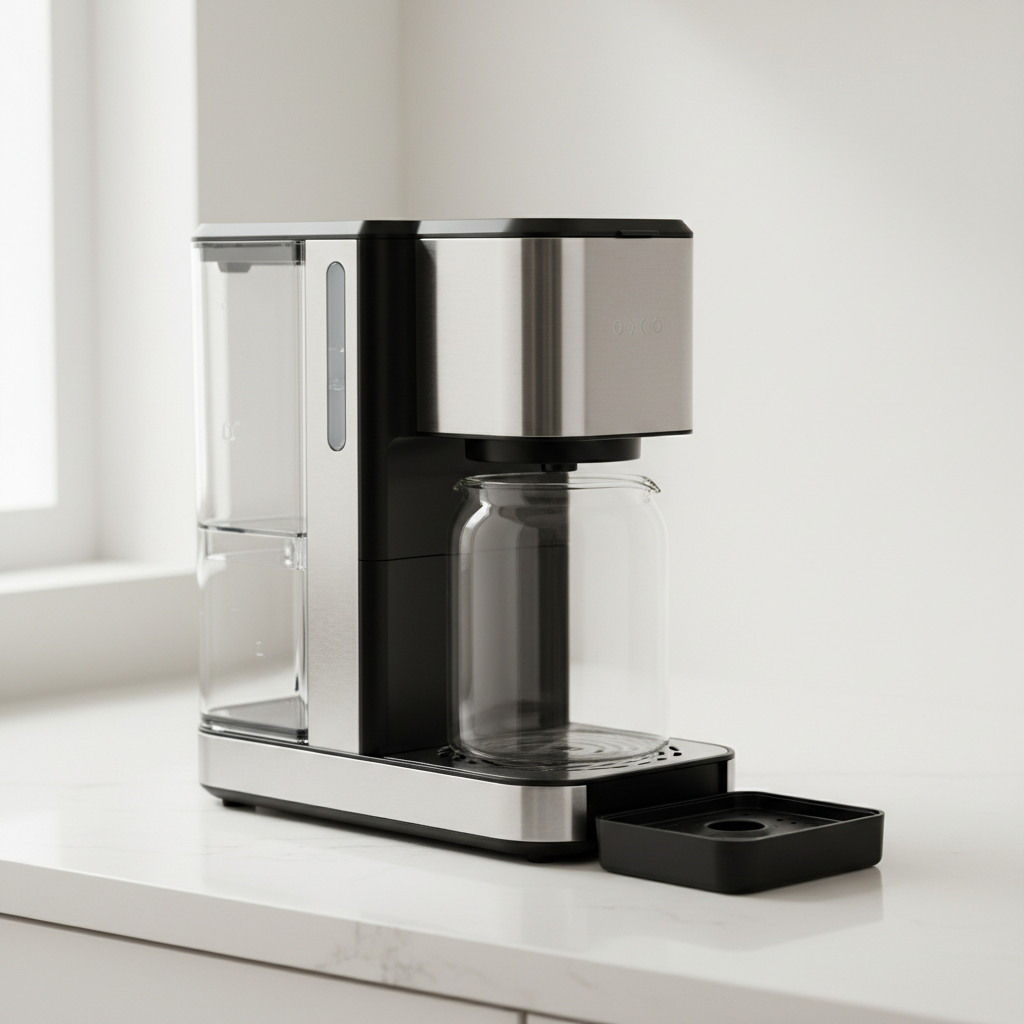
Step 1: Essential Preparation
Before the magic begins, gather your descaling solution and ready your machine.
- Empty the water reservoir: Pour out any lingering water.
- Remove any filters or pods: If your machine uses a water filter (like Brita filters) or coffee pods/capsules (Nespresso, Keurig), take them out. Descaling solution should never run through these.
- Empty and clean drip tray/waste bins: Clear them out to prevent messy overflows during the cycle.
- Position a large container: Place a large, heat-safe container (at least 4-6 cups capacity) under the brew spout and, if applicable, the steam wand/hot water dispenser to catch the solution.
- Initial external wipe down: A quick wipe of the machine’s exterior with a damp cloth keeps things tidy.
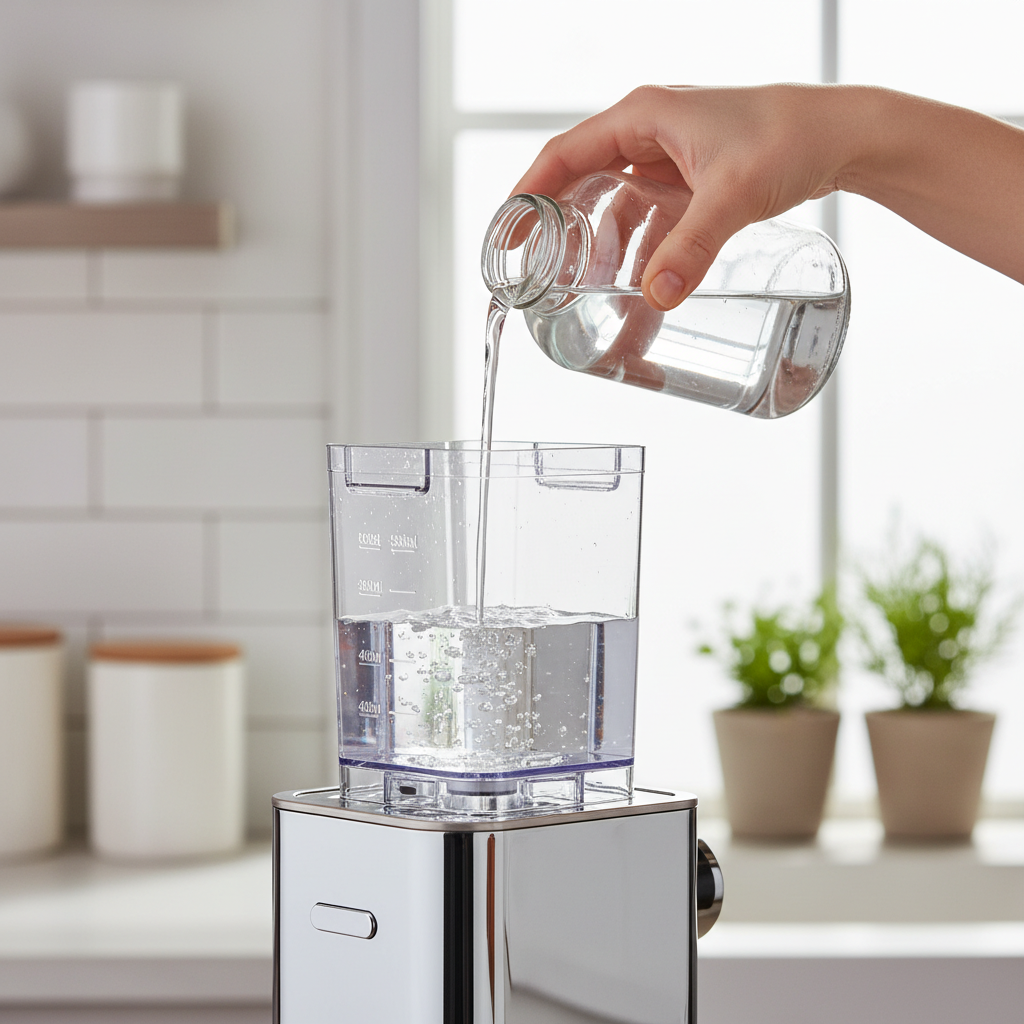
Step 2: Prepare and Add the Descaling Solution
Now, it’s time to introduce the descaler to your machine’s system.
- Mix the solution: Carefully follow your descaler’s instructions. If it’s a concentrated commercial solution or citric acid powder, dilute it with water in the reservoir according to the recommended ratio. For white vinegar, a common starting point is a 1:1 or 1:2 vinegar-to-water ratio. Never exceed recommended concentrations.
- Fill the reservoir: Pour the mixed descaling solution into the machine’s water reservoir.
- Power on: Fire up your coffee machine.
Step 3: Run the Descaling Cycle
Many modern machines feature a dedicated descaling mode, making this step almost effortless.
- Activate descaling mode: Consult your manual to engage the descaling cycle. This often involves pressing and holding specific buttons for a few seconds. If your machine lacks this mode, you’ll manually initiate brew cycles.
- Dispense through brew head: Start a brew cycle (or the descaling program). Let the machine dispense about half of the solution through the main brew head into your collection container.
- Dispense through steam wand (if applicable): If your machine boasts a steam wand or hot water dispenser, open it and allow some of the solution to flow through. This is crucial for espresso machines to ensure all pathways are cleaned.
- Resting time: Once roughly half the solution has run, pause the cycle (if possible) or turn off the machine. Let the descaling solution sit within the machine’s internal labyrinth for 15-30 minutes. This soaking period is vital for the acid to effectively break down stubborn limescale.
Step 4: Complete the Descaling Cycle
After the crucial resting period, it’s time to finish flushing the solution through.
- Resume cycle: Switch the machine back on and continue the descaling cycle. Allow the remaining solution to dispense through the brew head and, if applicable, the steam wand/hot water dispenser until the reservoir is completely empty.
- Empty collection container: Discard the collected descaling solution. Don’t be alarmed if it looks cloudy or discolored – that’s a good sign the descaler is doing its job!
Step 5: Thorough Rinsing Procedures
This is arguably the most critical step to ensure absolutely no descaling solution residue spoils your next glorious cup.
- Rinse the reservoir: Give the water reservoir a super thorough rinse with fresh, clean water multiple times to banish any lingering descaler traces.
- Fill with fresh water: Fill the reservoir with pristine, fresh water up to the MAX fill line.
- Run rinse cycles: Place your large collection container back under the brew spout. Run several full cycles of plain water through the machine (typically 2-3 full reservoirs). Remember to also run water through the steam wand/hot water dispenser if your machine has one. This flushes out any remaining descaling solution and loosened limescale particles. The water should eventually run clear and odorless.
- Repeat if necessary: If you detect even a hint of chemical smell or taste in the water after the initial rinse cycles, repeat the rinsing process with fresh water until the machine brews perfectly clean, tasteless water.
Step 6: Post-Descaling Cleanup
A final flourish to ensure everything is perfect and ready for brewing.
- Wipe down: Wipe down all internal and external components with a damp cloth. Reinstall any removed filters or pods.
- Initial brew (optional but recommended): Brew a sacrificial cup of coffee (using some cheap beans you don’t mind “wasting”) to confirm there’s no residual taste before you brew your favorite blend. This is your final quality check.
- Enjoy: You’re now poised to enjoy perfectly brewed coffee from a clean, efficient, and revitalized machine!
This universal guide lays a strong foundation for a sparkling clean machine. However, to truly conquer descaling for your specific model, you’ll want to understand its unique nuances. Our “General Coffee Machine Descaling Procedure: A Visual Walkthrough” offers even more detailed visual aids to shepherd you through each crucial step.
Model-Specific Descaling Instructions: Find Your Machine
Model-specific descaling instructions provide tailored guidance for different coffee machine types and brands, addressing unique features and material sensitivities beyond generic procedures.
While the universal steps offer a solid framework, the true mastery of descaling often lies in understanding your specific machine. Each coffee machine type and brand can come with unique features, specific descaling modes, and even different material sensitivities. This section will guide you on how to approach descaling based on common machine categories, always emphasizing our golden rule: consult your owner’s manual first!
Drip Coffee Makers
Drip coffee makers are generally simpler than their espresso counterparts, but descaling remains a vital act of care.
- Procedure: Follow the universal steps, typically mixing your chosen descaling solution (often a vinegar-water mix or a specific drip coffee descaler) into the water reservoir. Run half a brew cycle, let it sit for 15-30 minutes, then complete the cycle. Finish with 2-3 full water-only rinse cycles until no odor or residue remains.
- Key Consideration: Never submerge your drip coffee machine in water. Focus on hand-washing detachable parts like the carafe and filter basket in warm, soapy water. Ensure all components are completely dry before reassembling. Some manuals might indicate which parts are dishwasher safe.
- Example Brands: Cuisinart, Hamilton Beach, Mr. Coffee, KitchenAid. Many KitchenAid models, for instance, often recommend using 1 liter of undiluted white vinegar for descaling, followed by several fresh water rinses.
Pod/Capsule Coffee Machines (Nespresso, Keurig, etc.)
These convenience kings often boast specific descaling modes and proprietary solutions, making their process unique.
- Procedure: These machines typically feature a dedicated “descaling mode” that cleverly guides you with indicator lights and prompts. You’ll usually add a pre-packaged descaling solution (like the Nespresso Descaling Kit or Keurig Descaling Solution) to the reservoir, activate the mode, and the machine will automatically cycle through, sometimes requiring button presses at specific intervals.
- Key Considerations:
- Proprietary Kits: Using the brand’s recommended descaling kit is highly advisable to protect your warranty and prevent damage to specialized internal components.
- Activating Descaling Mode: This is paramount. For example, a Keurig might require holding the brew button and specific size buttons simultaneously. Nespresso machines, such as the “VertuoPlus” or “Vertuo Next” models, often have specific sequences of button presses.
- Thorough Rinsing: After the descaling cycle, these machines will invariably prompt you for multiple clean water rinses. Do not skimp on this step!
- Example Brands: Nespresso (Vertuo, Original lines), Keurig (K-Cup, K-Duo, K-Cafe), Dolce Gusto. Keurig explicitly states: “Not all Keurig brewers have the same descale instructions. Find your brewer’s specific instructions by selecting your brewer from the list below.”

Pro Tip from Home Brew Log: For many Nespresso Vertuo models, if the descaling light remains on after rinsing, a common trick is to press and hold the brew button for at least 3-5 seconds after the final rinse cycle to manually reset the indicator. Always double-check your specific model’s manual if this doesn’t work!
For a more granular approach to common coffee machine models and their unique descaling quirks, explore our “Descaling Guides for Specific Coffee Machine Brands and Models” where we break down popular machines step-by-step. Remember, your owner’s manual remains the gold standard for safe, effective, and warranty-compliant descaling.
Semi-Automatic and Super-Automatic Espresso Machines
These sophisticated machines are often the most complex, featuring intricate internal systems, boilers, and milk frothing components that demand precise descaling.
- Procedure: These typically boast advanced, often automated, descaling cycles. You’ll add a specific espresso machine descaler (often citric acid-based) to the water tank and activate the descaling program. The machine then guides you through dispensing solution through the brew group, hot water spout, and steam wand.
- Key Considerations:
- Specific Descaler Types: High-end espresso machines, particularly those with brass or copper boilers, are highly sensitive to aggressive acids like vinegar. Always use a descaler explicitly designed for espresso machines.
- Milk Systems: If your machine has an integrated milk frothing system, this will often have its own separate cleaning and descaling requirements to prevent both milk residue and limescale buildup.
- Automated Cycles: Pay close attention to the machine’s display and prompts; these often walk you through complex cycles involving multiple rinses and solution applications.
- Example Brands: Breville, De’Longhi, Gaggia, Jura, Philips. De’Longhi often emphasizes: “Descaling procedure varies depending on the machine model. Please confirm your Magnifica Evo version. To identify your coffee machine please pay attention to…”
Troubleshooting & FAQs: Common Descaling Challenges
Troubleshooting addresses common issues during and after descaling, such as persistent indicator lights or lingering tastes, providing solutions to restore optimal machine function.
Even the most meticulous brewers can hit a snag during descaling. Don’t sweat it! We’re here to help you navigate those “head-scratching moments” and get your machine back to peak performance.
Addressing Common Issues
- Descaling Light Won’t Turn Off: This is a surprisingly common frustration, especially with pod machines.
- Solution: Most often, it means the descaling cycle wasn’t fully completed, or the machine didn’t register its completion. Ensure you’ve meticulously followed all steps, including the rinse cycles. Many machines require a specific button-press sequence after the rinse cycles to reset the descaling indicator. Scour your manual for the exact reset procedure.
- Bad Taste or Odor After Descaling: A metallic, chemical, or vinegary taste/smell in your coffee post-descaling almost always signals insufficient rinsing.
- Solution: Run at least 2-3 more full water-only cycles through the machine. If the taste persists, try a “sacrificial” brew with some cheap coffee grounds; they can sometimes help absorb lingering residues. Double-check that all removable parts were also thoroughly rinsed.
- Machine Still Operating Slowly or Water Flow is Weak: This could point to persistent scale buildup or an underlying issue.
- Solution: If you used a milder descaler or less concentration, a second descaling cycle might be necessary. If the problem persists, there might be a more significant blockage that requires professional servicing.
- Descaling Cycle Not Completing Properly: The machine might halt mid-cycle or flash an error code.
- Solution: Check the water level; the reservoir might be empty. Ensure your collection container isn’t overflowing. Try a power cycle: turn the machine off, unplug it for 30 seconds, then plug it back in and restart. If an error code appears, consult your manual immediately.
- Preventing Damage: Improper solution use (e.g., undiluted vinegar in an aluminum boiler) or incorrect procedures (like skipping rinse cycles) can be detrimental.
- Solution: Always use the manufacturer’s recommended descaler or a known safe alternative like food-grade citric acid. Adhere strictly to dilution ratios and never skip the rinsing steps.
Frequently Asked Questions
Can I use household bleach or other strong cleaners to descale my coffee machine?
Absolutely NOT. Household bleach and other strong cleaning agents are highly corrosive, toxic, and can cause irreparable damage to your coffee machine’s internal components, including seals, plastics, and metals. Crucially, they can also leave harmful residues that are dangerous if ingested. Always stick to descaling solutions specifically designed for coffee machines or approved natural alternatives like citric acid.
How often should I descale my coffee machine?
The frequency is a dance between two key partners: your water hardness and how often you use your machine.
- Hard Water & Frequent Use (multiple cups/day): Aim for every 1-2 months.
- Moderate Water & Moderate Use (1-2 cups/day): Every 3-6 months should suffice.
- Soft Water & Infrequent Use: You might get away with every 6-12 months.
Many smart machines will even have indicator lights to prompt you when descaling is due. Always consult your machine’s manual for its specific recommendations.
What if my machine doesn’t have a “descaling mode”?
If your coffee machine lacks a dedicated descaling mode (common in simpler drip machines), you’ll perform the descaling manually, following our universal steps:
- Mix the descaling solution with water in the reservoir.
- Run half a brew cycle to dispense about half the solution.
- Pause the machine and let the solution sit for 15-30 minutes to work its magic.
- Resume and run the remaining solution through.
- Thorouhgly rinse the machine by running 2-3 full reservoirs of plain water through it until the water runs clear and odorless.
My coffee still tastes bad after descaling, what else could be wrong?
If descaling hasn’t solved the taste puzzle, let’s look at other culprits:
- Old/Stale Beans: Coffee beans lose their vibrant flavor surprisingly quickly after roasting and grinding. Are yours fresh?
- Incorrect Grind Size: Too fine or too coarse a grind can lead to frustrating over or under-extraction.
- Water Quality: Even with a descaled machine, unfiltered or poor-tasting tap water can sabotage your brew. Consider a water filter.
- General Cleaning: Ensure other parts (portafilter, brew basket, drip tray, milk frother) are impeccably clean of coffee oils and residues.
- Machine Malfunction: In rare instances, an internal component might be faulty.
Persistent scale buildup in tiny nozzles or the brew head might require more targeted cleaning or a repeat descaling with a stronger (yet still machine-safe) solution. If you’re still wrestling with issues, our “Coffee Machine Descaling Troubleshooting Guide: Fix Common Issues” offers a deeper dive into specific error codes and solutions.
Beyond Descaling: Best Practices for Coffee Machine Longevity
Beyond descaling, holistic coffee machine maintenance encompasses daily cleaning, filtered water usage, and regular component checks, all crucial for maximizing machine lifespan and ensuring consistent brew quality.
Descaling is a cornerstone, yes, but it’s just one piece of a comprehensive maintenance puzzle. Integrating it into a broader routine ensures your machine not only endures for years but continues to brew that exceptional coffee you crave, day after glorious day. This holistic approach is what keeps our “Helpful Coffee Nerd” hearts truly content.
Holistic Maintenance Routine
Think of your coffee machine as a finely tuned instrument – it thrives on regular, attentive care:
- Daily Ritual: After each use, rinse the portafilter (for espresso machines), drip tray, and water reservoir. A quick wipe down of the exterior keeps it gleaming.
- Weekly Deep Clean: Dedicate time to deep clean removable parts with warm, soapy water. If you have an espresso machine, backflush it if applicable, and meticulously clean those milk wands.
- Monthly (or Bi-Monthly) Descaling: As discussed, tailor this frequency to your water hardness and usage.
- Annual Checks: Consider replacing water filters, seals, or gaskets if they show signs of wear. For high-end machines, an annual professional service can be a wise investment.
The Benefits of Using Filtered Water
This is a true game-changer in the battle against limescale. Using filtered water dramatically reduces the mineral content entering your machine, thereby extending the time between descaling cycles and making your descaling efforts even more effective.
- Significantly Reduced Limescale: Fewer calcium and magnesium minerals mean less scale formation, giving your machine an easier life.
- Elevated Taste: Filtered water often removes chlorine and other impurities, allowing the nuanced, true flavors of your coffee to shine without interference.
- Machine Protection: Less internal buildup means less strain on heating elements and pumps, preventing premature wear and tear.
Consider investing in a Brita filter pitcher, a tap filter, or even a plumbed-in filtration system. (Just a quick note: some machines require some mineral content for proper sensing, so if you’re considering distilled water, always check your manual first!)
Proper Storage and Regular Component Checks
Even when your machine is taking a break, thoughtful care pays dividends.
- Storage: If you’re storing your machine for an extended period, ensure it’s thoroughly cleaned, fully descaled, and completely dry to prevent any unwelcome mold or mildew growth.
- Component Checks: Make it a habit to periodically inspect your machine’s gaskets, seals, and hoses for any signs of cracking, wear, or leaks. Catching these small issues early can preempt much larger, more expensive repairs down the road. A swift visual check during your daily routine takes mere seconds but can save you countless headaches.
Routine cleanings truly are the simplest and most effective way to guarantee a long, happy life for your coffee maker. By embracing these practices, you’re not just performing maintenance; you’re making a continuous investment in your daily ritual, ensuring every future cup is as delightful and consistent as the very first. This dedication to care translates directly into maximizing your machine’s lifespan and consistently maintaining that peak brewing performance you love.
Ready to dive deeper into a holistic regimen that goes far beyond basic descaling? Our “Comprehensive Coffee Machine Maintenance: Beyond Just Descaling” guide covers everything you need to keep your coffee station pristine and brewing flawlessly for years to come.